The other day, I got a warning that boot partition is almost full or has no space left. Yes, I have a separate boot partition, not many people do that these days, I believe.
This was the first time I saw such an error and it left me confused. Now, there are several ways to free up space on Ubuntu (or Ubuntu-based distros) but not all of them are useful in this case.
This is why I decided to write about the steps I followed to free some space in the /boot partition.
Free up space in /boot partition on Ubuntu (if your boot partition is running out of space)
I’d advise you to carefully read through the solutions and follow the one best suited for your situation. It’s easy but you need to be cautious about performing some of these on your production systems.
Method 1: Using apt autoremove
You don’t have to be a terminal expert to do this, it’s just one command and you will be removing unused kernels to free up space in the /boot partition.
All you have to do is, type in:
sudo apt autoremoveThis will not just remove unused kernels but also get rid of the dependencies that you don’t need or isn’t needed by any of the tools installed.
Once you enter the command, it will list the things that will be removed and you just have to confirm the action. If you’re curious, you can go through it carefully and see what it actually removes.
Here’s how it will look like:

You have to press Y to proceed.
It’s worth noting that this method will only work if you’ve a tiny bit of space left and you get the warning. But, if your /boot partition is full, APT may not even work.
In the next method, I’ll highlight two different ways by which you can remove old kernels to free up space using a GUI and also the terminal.
Method 2: Remove Unused Kernel Manually (if apt autoremove didn’t work)
Before you try to remove any older kernels to free up space, you need to identify the current active kernel and make sure that you don’t delete that.
To check your kernel version, type in the following command in the terminal:
uname -rThe uname command is generally used to get Linux system information. Here, this command displays the current Linux kernel being used. It should look like this:
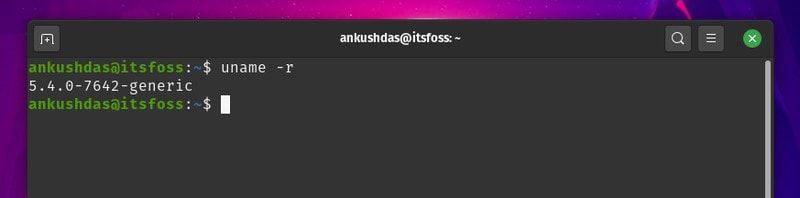
Now, that you know what your current Linux Kernel is, you just have to remove the ones that do not match this version. You should note it down somewhere so that you ensure you do not remove it accidentally.
Next, to remove it, you can either utilize the terminal or the GUI.
Warning!
Be extra careful while deleting kernels. Identify and delete old kernels only, not the current one you are using otherwise you’ll have a broken system.
Using a GUI tool to remove old Linux kernels
You can use the Synaptic Package Manager or a tool like Stacer to get started. Personally, when I encountered a full /boot partition with apt broken, I used Stacer to get rid of older kernels. So, let me show you how that looks.
First, you need to launch “Stacer” and then navigate your way to the package uninstaller as shown in the screenshot below.
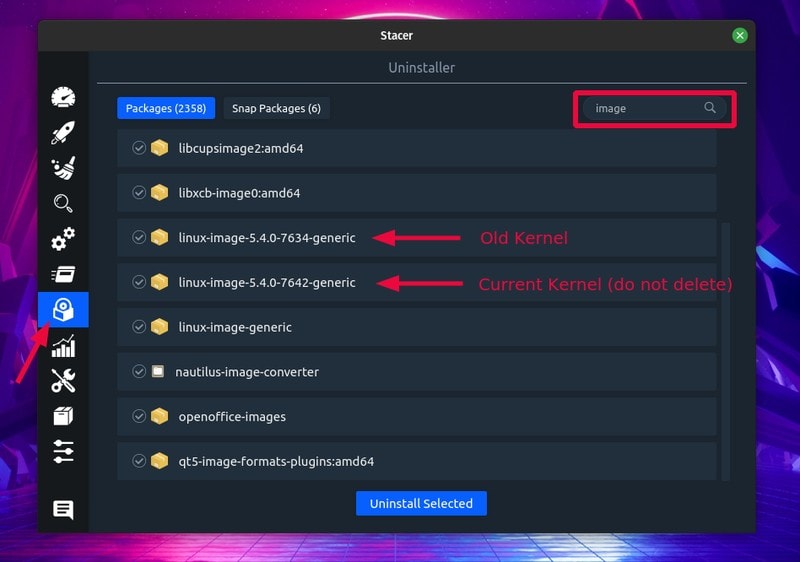
Here, search for “image” and you will find the images for the Linux Kernels you have. You just have to delete the old kernel versions and not your current kernel image.
I’ve pointed out my current kernel and old kernels in my case in the screenshot above, so you have to be careful with your kernel version on your system.
You don’t have to delete anything else, just the ones that are the older kernel versions.
Similarly, just search for “headers” in the list of packages and delete the old ones as shown below.
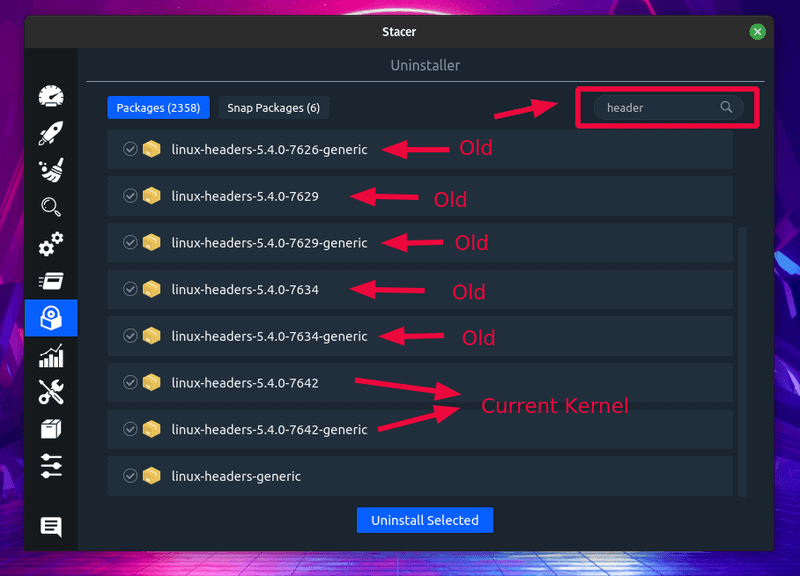
Just to warn you, you don’t want to remove “linux-headers-generic”. Only focus on the ones that have version numbers with them.
And, that’s it, you’ll be done and apt will be working again and you have successfully freed up some space from your /boot partition. Similarly, you can do this using any other package manager you’re comfortable with.
Using the command-line to remove old kernels
It’s the same thing but just using the terminal. So, if you don’t have the option to use a GUI (if it’s a remote machine/server) or if you’re just comfortable with the terminal, you can follow the steps below.
First, list all your kernels installed using the command below:
ls -l /bootIt should look something like this:
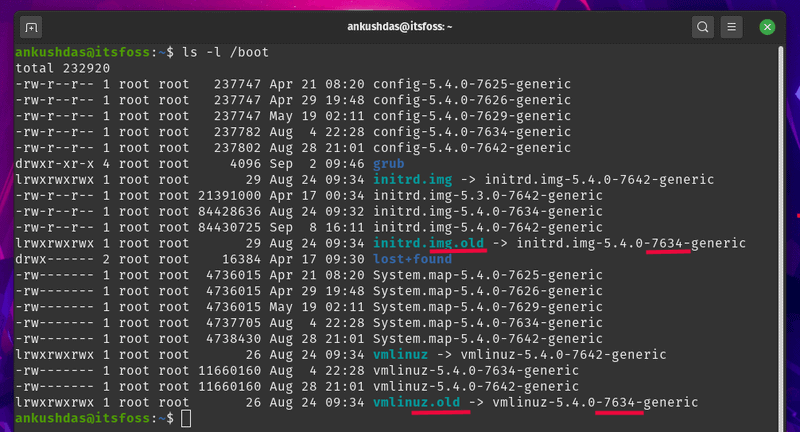
The ones that are mentioned as “old” or the ones that do not match your current kernel version are the unused kernels that you can delete.
Now, you can use the rm command to remove the specific kernels from the boot partition using the command below (a single command for each):
sudo rm /boot/vmlinuz-5.4.0-7634-genericMake sure to check the version for your system — it may be different for your system.
If you have a lot of unused kernels, this will take time. So, you can also get rid of multiple kernels using the following command:
sudo rm /boot/*-5.4.0-{7634}-*To clarify, you need to write the last part/code of the Kernel versions separated by commas to delete them all at once.
Suppose, I have two old kernels 5.4.0-7634-generic and 5.4.0-7624, the command will be:
sudo rm /boot/*-5.4.0-{7634,7624}-*If you don’t want to see the old kernel version in the grub boot menu, you can simply update grub using the following command:
sudo update-grubThat’s it. You’re done. You’ve freed up space and also potentially fixed the broken APT if it was an issue after your /boot partition filled up.
In some cases, you may need to enter these commands to fix the broken apt (as I’ve noticed in the forums):
sudo dpkg --configure -a
sudo apt install -f
Do note that you don’t need to enter the above commands unless you find APT broken. Personally, I didn’t need these commands but I found them handy for some on the forums.